Getting Creative with Long-Exposure Shots on the Road
21 January 2026
Have you ever looked at breathtaking long-exposure photography and wondered, how do they do that? Those dreamy light trails on a busy highway, silky smooth waterfalls, or the hypnotic motion blur of rushing pedestrians—all captured with just a camera and a bit of patience.
Long-exposure photography isn’t just for professionals armed with fancy gear. With the right settings, some creativity, and a little practice, you can create mesmerizing travel shots that stand out. Let's dive into the magic behind long-exposure shots and how you can take your photography to the next level while on the road. 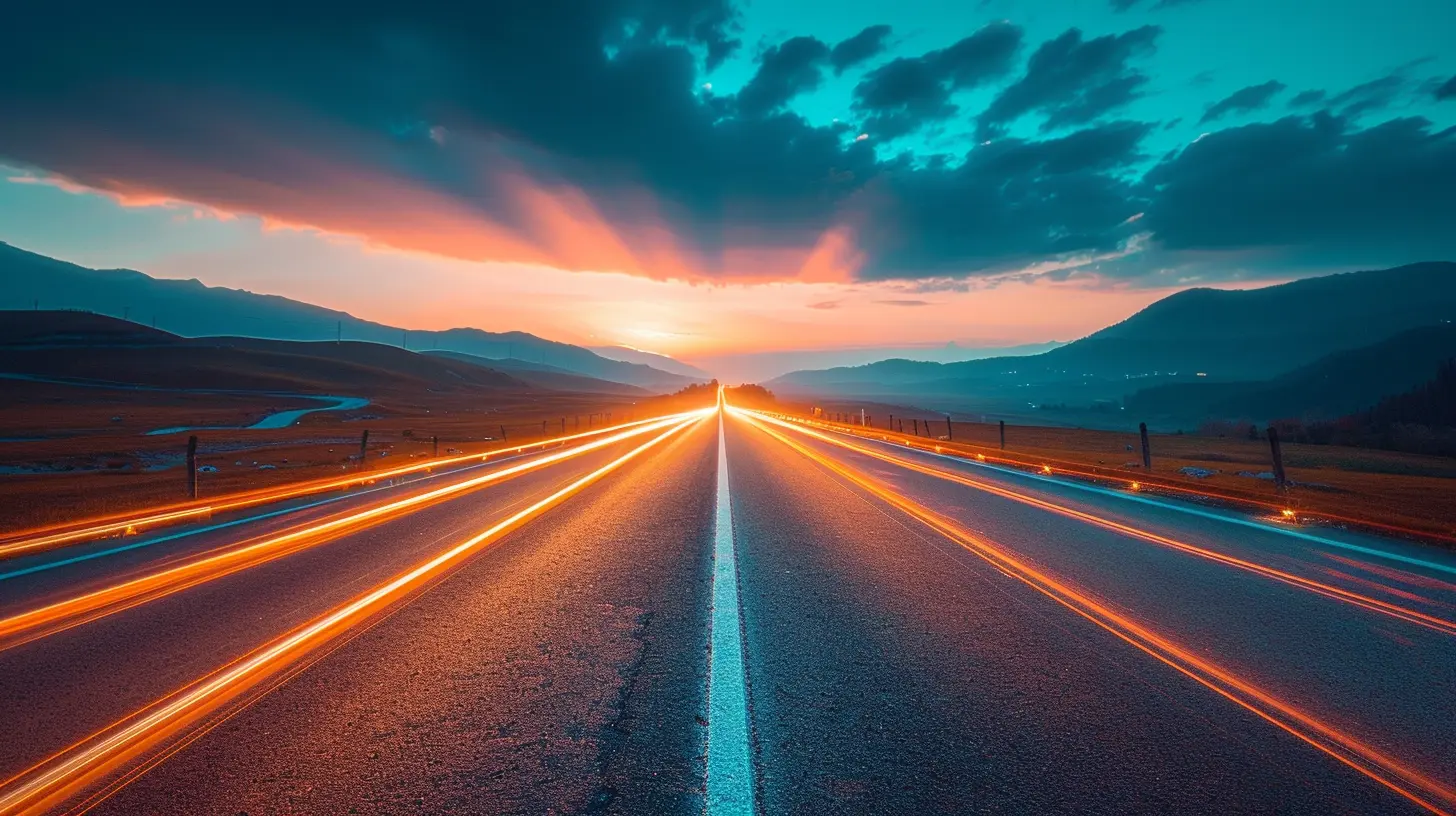
What is Long-Exposure Photography?
Long-exposure photography is all about slowing down time. By keeping the camera shutter open for an extended period, moving elements in your shot blur, while stationary objects remain sharp. The result? A surreal, almost painting-like image that captures movement in a way that regular photography simply can't.Think of it like this: If a regular photo is a single note, long-exposure photography is an entire melody. It allows you to blend multiple moments into one frame, creating an artistic and dynamic effect. 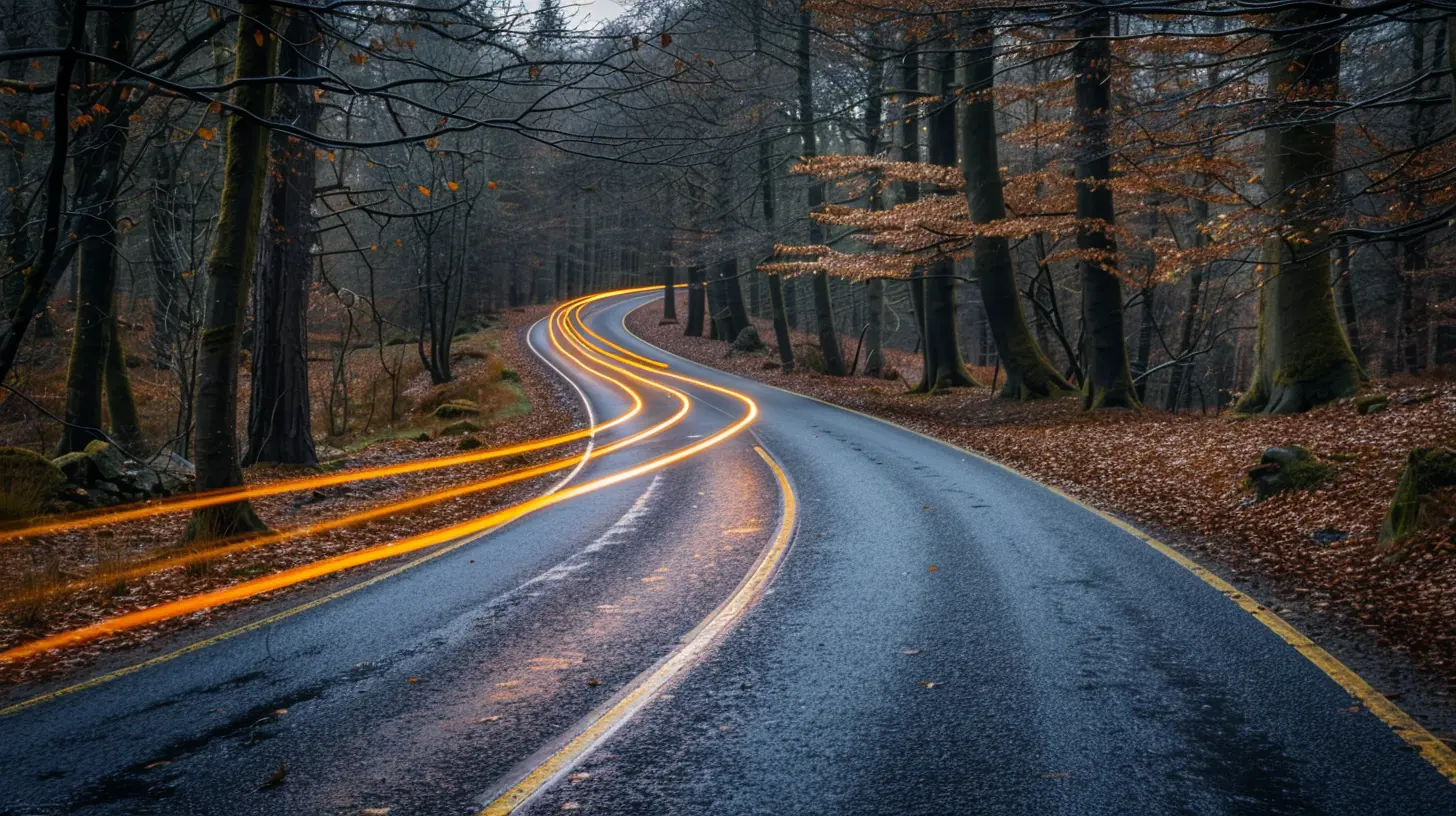
Essential Gear for Long-Exposure Shots
While you don’t need a professional-grade setup to take incredible long-exposure shots, a few essential pieces of equipment can make your life much easier:1. A Camera with Manual Mode
Most DSLRs, mirrorless cameras, and even high-end smartphones now offer manual controls. You'll need the ability to adjust shutter speed, aperture, and ISO manually.2. A Sturdy Tripod
Longer exposure times mean even the slightest hand movement can ruin your shot. A sturdy tripod is a must to keep your camera stable and eliminate unwanted blur.3. A Remote Shutter or Timer
Pressing the shutter button can cause vibrations, so either use a remote shutter release or the camera’s built-in timer to keep things steady.4. Neutral Density (ND) Filters
Think of ND filters as sunglasses for your lens. They reduce the amount of light entering the camera, allowing you to use longer shutter speeds even in bright daylight.5. Patience and Creativity
Long-exposure photography often requires trial and error, so don’t be discouraged if your first few shots aren't perfect.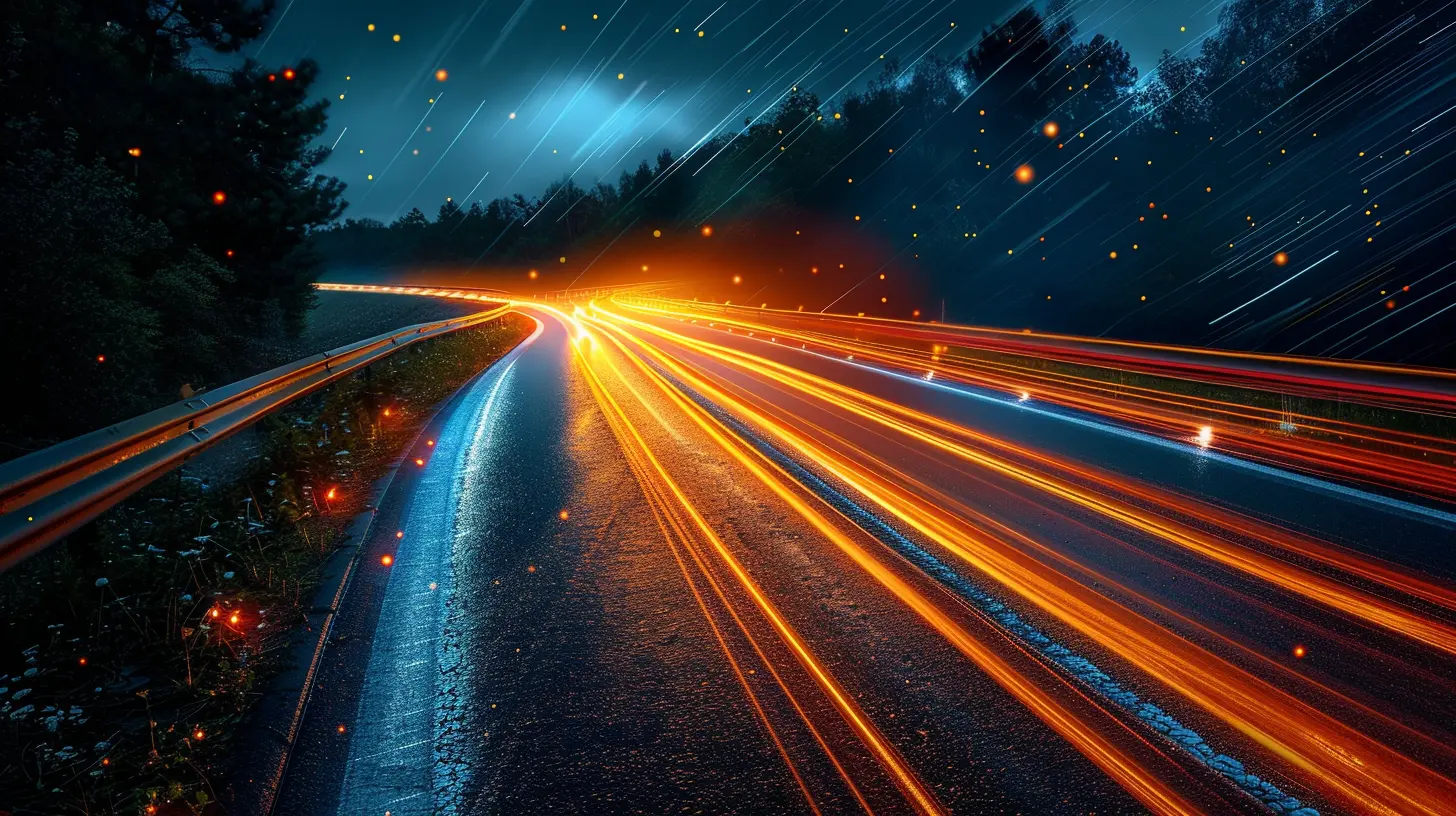
Best Long-Exposure Photography Ideas While Traveling
1. Capturing Light Trails from Cars
One of the most eye-catching long-exposure techniques involves capturing the trails of car headlights and taillights at night.Best Settings:
- Shutter Speed: 10-30 seconds
- Aperture: f/8 - f/16
- ISO: 100-200
Pro Tip: Find an overpass or an urban street with busy traffic. Set your camera on a tripod and wait for cars to pass through. The moving lights will create beautiful streaks across your frame.
2. Smooth and Silky Waterfalls
Ever wonder how photographers get waterfalls to look like flowing silk? That’s the power of long exposure!Best Settings:
- Shutter Speed: 2-10 seconds
- Aperture: f/11 - f/16
- ISO: 100
Pro Tip: Use an ND filter if you're shooting in bright daylight. Without it, your shot might be overexposed even at the lowest ISO setting.
3. Painting with Light (Light Graffiti)
Using a flashlight, sparkler, or even your phone, you can "paint" light into your photos.Best Settings:
- Shutter Speed: 10-30 seconds
- Aperture: f/5.6 - f/11
- ISO: 100
Pro Tip: Find a dark area, set your camera on a tripod, and use a flashlight to draw shapes or words in the air while the shutter is open.
4. Capturing Star Trails
Shooting the night sky with a long exposure can reveal the movement of the stars, creating stunning circular patterns.Best Settings:
- Shutter Speed: 30 seconds to several minutes
- Aperture: f/2.8 - f/4
- ISO: 800-3200
Pro Tip: If you’re in an area with minimal light pollution, try stacking multiple long-exposure shots to create even longer star trails using post-processing software.
5. Ghostly Pedestrian Blurs
Ever wanted to capture a bustling city street with an eerie, ghost-like effect? Long-exposure photography can make people appear almost transparent as they walk through your frame.Best Settings:
- Shutter Speed: 5-15 seconds
- Aperture: f/8 - f/11
- ISO: 100-200
Pro Tip: Position yourself in a crowded place like a marketplace or train station and let the moving people blur while the background remains sharp. 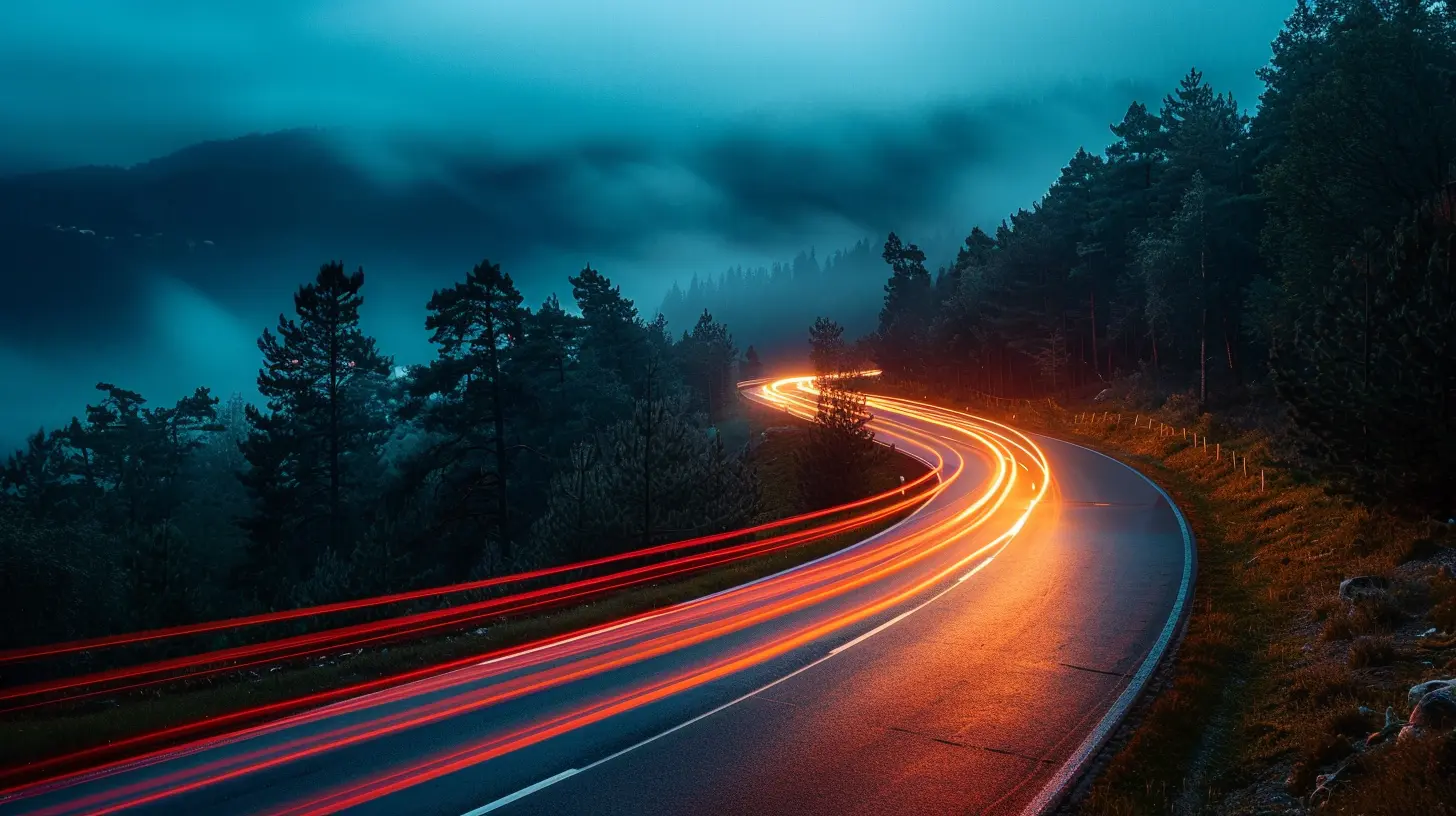
Quick Tips for Perfecting Your Long-Exposure Shots
1. Use Manual Focus
Autofocus can struggle in low light. Switch to manual focus and adjust it carefully to get crisp results.2. Check Your Histogram
Your camera’s preview might look fine, but always check the histogram to avoid over- or under-exposing your image.3. Shoot in RAW Format
RAW files preserve the most detail, giving you more flexibility during editing.4. Experiment with Shutter Speeds
There’s no one-size-fits-all setting; tweak your shutter speed and see how different effects play out.5. Scout Locations in Advance
Great shots require great compositions. Plan ahead and scout locations during daylight to frame the perfect shot.Editing Your Shots for That Extra Wow Factor
Even the best long-exposure shots can benefit from a little post-processing magic. Here’s how to enhance them:- Adjust Contrast & Exposure: Boosting contrast can add depth and drama.
- Reduce Noise: Long exposures can introduce noise, especially in night photography. Tools like Adobe Lightroom can help reduce this.
- Enhance Colors: Slight tweaks in saturation and vibrance can make light trails pop.
- Sharpen Details: Mild sharpening can make stationary elements look crisp.
Final Thoughts
Long-exposure photography is like unlocking a hidden superpower. It allows you to see movement in ways the naked eye never could. Whether you're capturing stunning cityscapes, mesmerizing waterfalls, or the dazzling night sky, this technique can take your travel photography to the next level.So, the next time you're on the road, set up your tripod, slow down time, and get creative with long-exposure shots. Who knows? Your next masterpiece might just be one shutter click away.
all images in this post were generated using AI tools
Category:
Photography TipsAuthor:

Shane Monroe
Discussion
rate this article
2 comments
Miranda Wallace
Capture magic with long-exposures—happy shooting, traveler!
February 8, 2026 at 3:39 AM
Shane Monroe
Thank you! Excited to share the magic of long exposures on the journey! Happy shooting to you too!
Veronica Palmer
Stunning tips for capturing magical road trip moments!
January 21, 2026 at 5:32 AM
Shane Monroe
Thank you! I'm glad you found the tips helpful for capturing those enchanting moments on your road trip! Safe travels!