Night Photography Tips for Capturing Cities After Dark
26 January 2026
So, you’ve decided you want to dive into the mysterious, seductive world of night photography. Ah yes, the glamorous life of standing on a sketchy sidewalk at 2 AM holding a tripod, trying to capture the "soul" of the city while dodging drunk people and weird noises. You romantic devil, you.
But hey, when you nail that killer shot of neon lights reflecting off wet pavement? Totally worth it. If you've ever looked at a moody night cityscape on Instagram and screamed internally, "Why don’t MY photos look like that?!"—this article is for you.
Grab your camera, a double espresso, and maybe a pepper spray (you know, just in case), and let’s talk about how to transform your night photography from "meh" to magazine-worthy.
The Magic (and Madness) of Night Photography
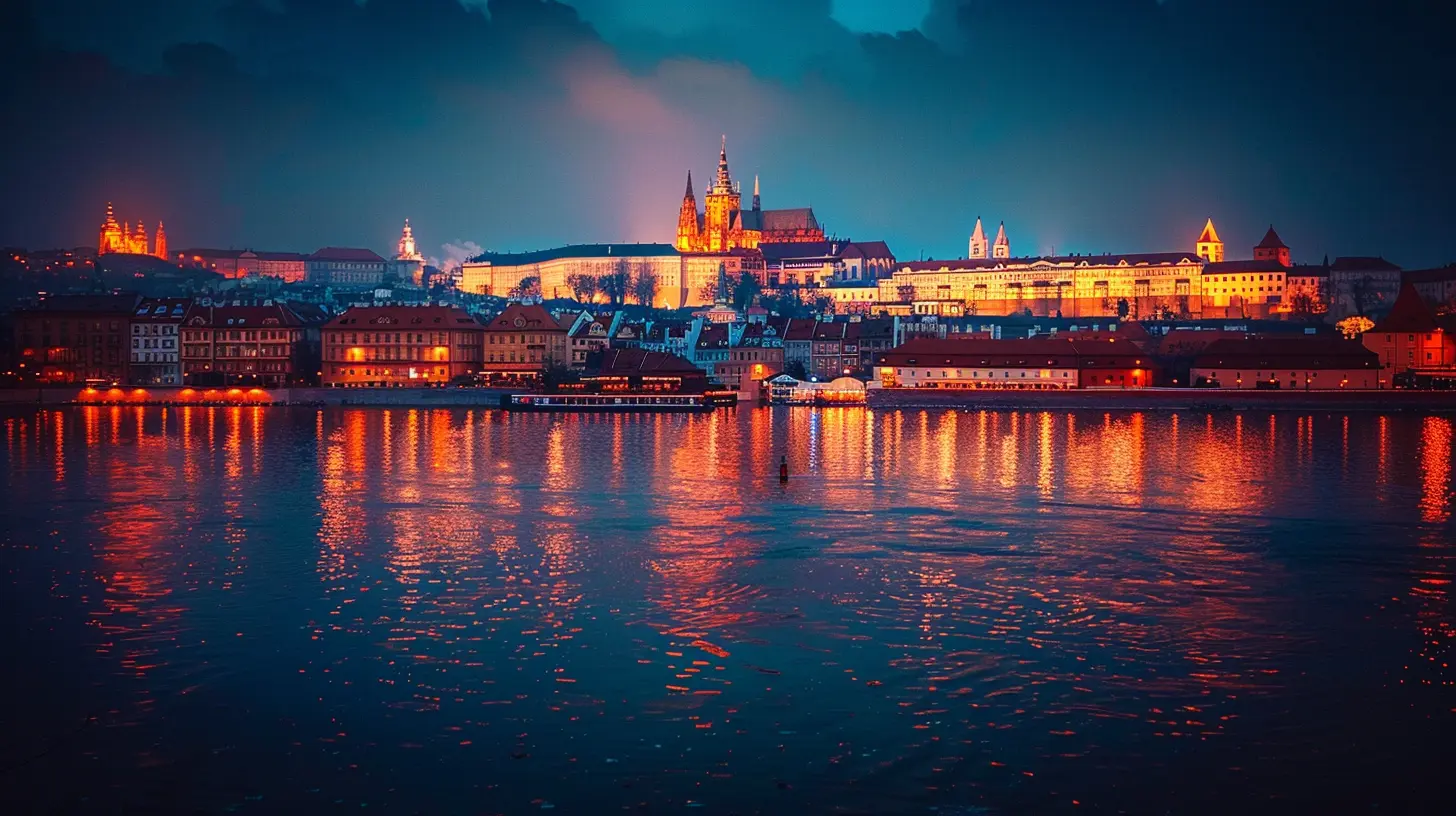
Night photography in cities is like a cheat code for making your photos look cooler than you actually are. The city after dark wears a whole new outfit—think less office worker, more rockstar on a Red Bull. Lights shimmer, buildings glow, streets empty out, and suddenly even a trash can under a street lamp looks like art.But capturing that magic? That’s where the dance begins. Your camera isn’t used to the dark, so you’ve got to guide it, coax it, and sometimes outright fight with it. Let’s get to it.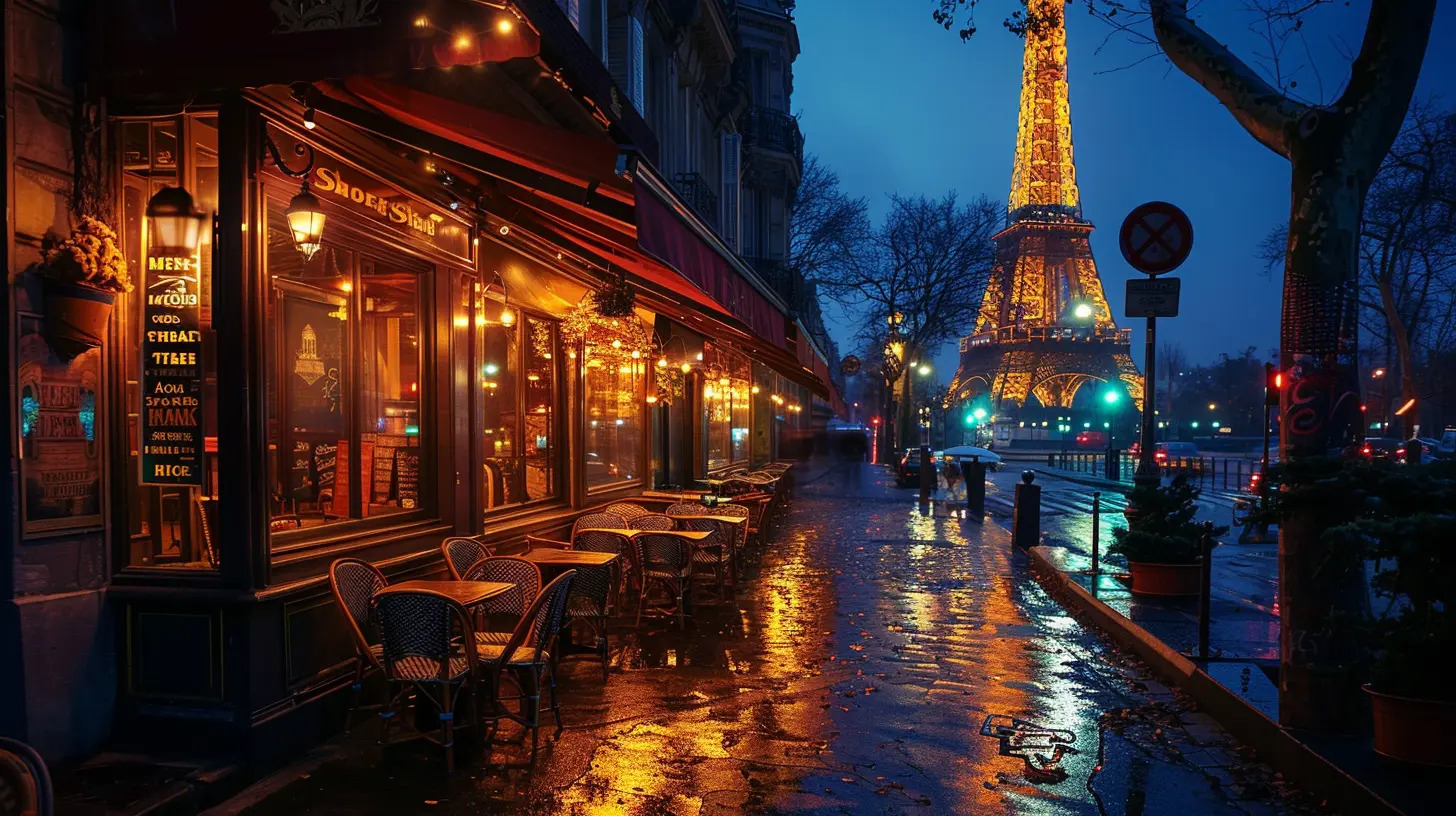
Gear Up or Give Up: The Equipment That Matters
📷 Bring a Real Camera (Sorry, iPhone)
Yes, I know your phone has "Night Mode." Guess what? So does my toaster. You want dramatic long exposures, low noise, and detail that doesn't disappear into a soup of pixels. So unless you're just in it for the Instagram likes (no judgment), bring a DSLR or mirrorless camera.🦵 A Tripod: Your Third Leg
Trying to shoot long exposures without a tripod is like trying to draw a perfect circle on a bumpy bus ride. You could do it, but you’re setting yourself up for heartbreak. Invest in one. You don’t need the fancy $400 model with laser-guided stabilization. Just get one that won’t blow over in the wind.💡 Remote Shutter or Self-Timer
Ever press the shutter button and get a photo that looks like you were in the middle of an earthquake? That’s camera shake, my friend. Solve it with a remote shutter or just use your camera’s built-in timer (2-second delay is your best friend here).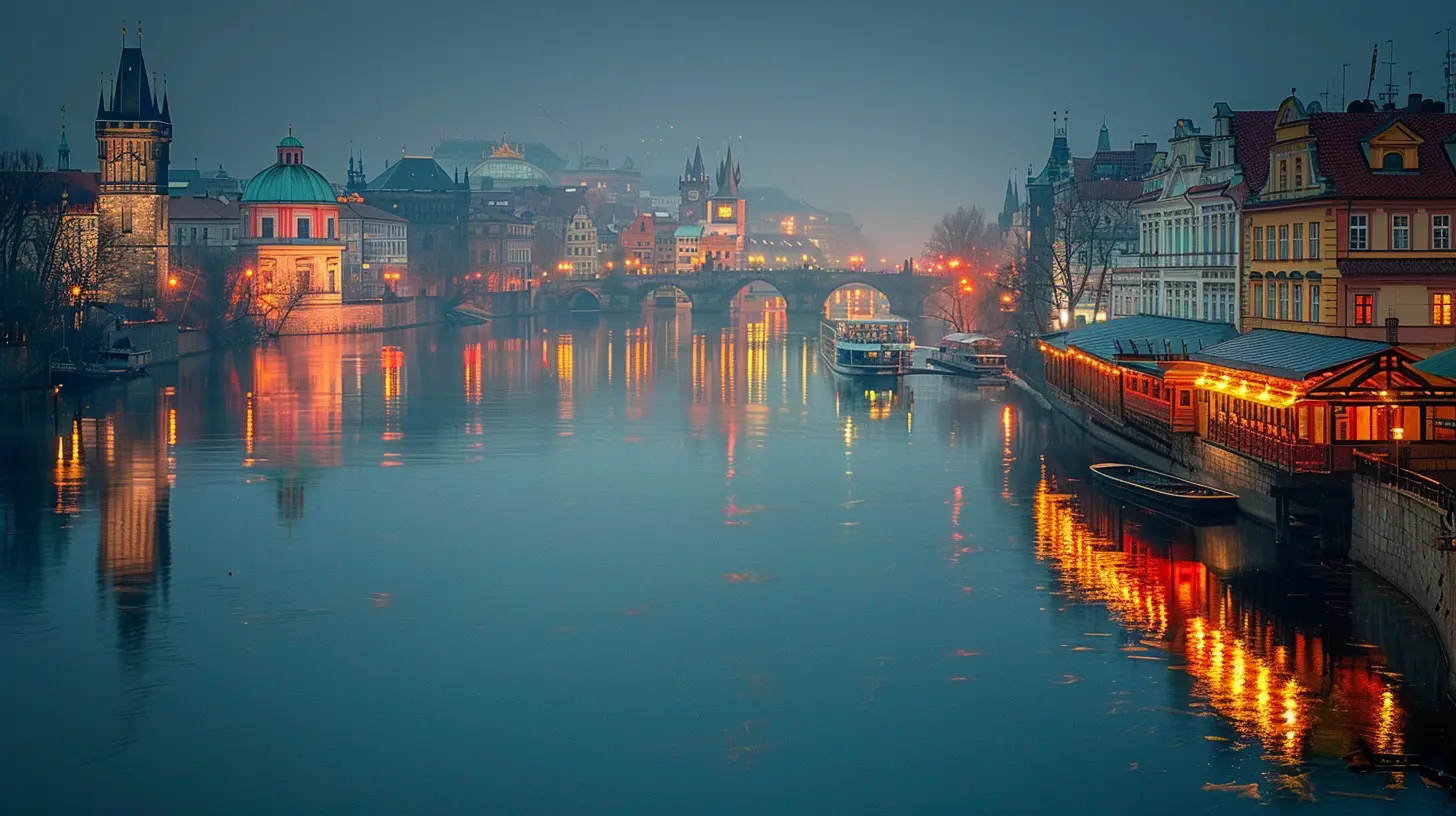
Setting the Scene: Camera Settings That Actually Work
🔦 Embrace the Darkness (But Not Too Much)
Let’s talk about ISO, aperture, and shutter speed—the holy trinity of photography. At night, they dance a little differently.ISO: Keep It Low-ish
Crank ISO too high and your photo will look like it was shot with mashed potatoes. Start low (around 100-800), and only increase if your shutter speed is getting out of hand.Aperture: Open Wide (But Not Wide Open)
A wide aperture (f/2.8 to f/4) lets in more light, which is great—but go too wide and you’ll lose sharpness. Plus, if you’re shooting cityscapes, you probably want more of the scene in focus. Rule of thumb? f/5.6 to f/8 is a safe sweet spot.Shutter Speed: The Long Haul
Here’s where night photography gets fun—and weird. You’ll want to use longer exposures (5, 10, or even 30 seconds) to get that dreamy, creamy look of car lights and glowing windows. Just don’t breathe on your tripod. Seriously. Not even a little.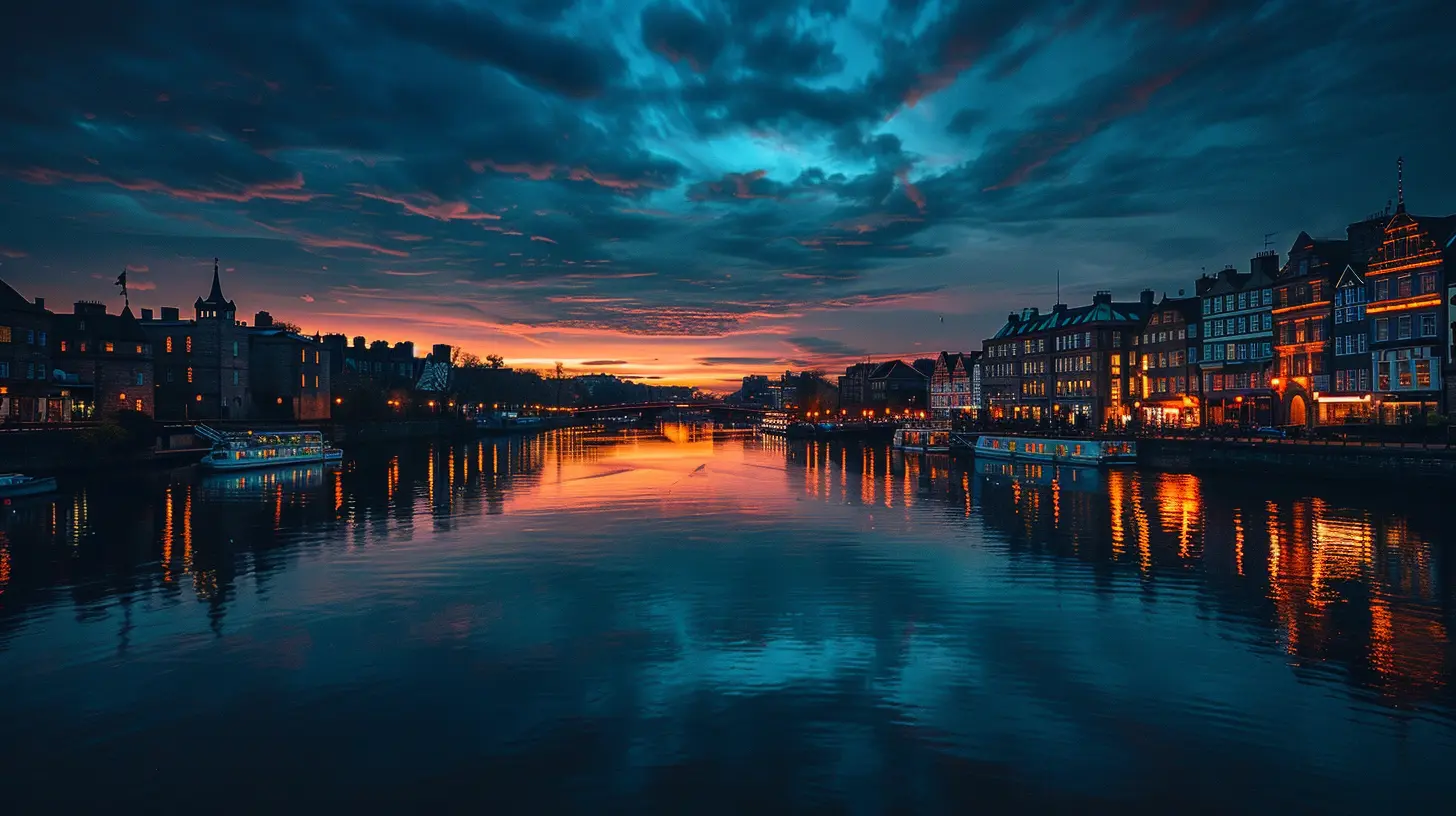
Composition Like a Boss: Make People Stop Scrolling
🚥 Light Trails = Instant Cool
Nothing screams “I know what I’m doing” like a shot with glowing streams of red and white lights trailing through the frame. Stand near a busy road, point your camera where traffic flows, dial in a 10–20 second exposure, and boom—you’re basically Ansel Adams with a caffeine addiction.🧱 Use Architecture as Your Playground
Cities at night offer some stellar shapes, lines, and reflections. Use buildings, bridges, street signs, and staircases to frame your shot. Bonus points if you find a puddle for a reflection. Double bonus if you don’t step in it.🌉 Symmetry and Reflections Are Your Soulmates
Cities love to show off with symmetrical bridges, perfectly aligned skyscrapers, and glass walls. Exploit that. Throw in a reflection and you’ve just teleported your photo from “meh” to “museum.”👽 Add a Subject (Or a Mysterious Silhouette)
Throw a person in your shot. Better yet, ask them to wear a hoodie and look mysterious. Suddenly your cityscape isn’t just pretty—it’s a story. Besides, what's more urban-night-photography than a lone figure under a streetlight? (Answer: nothing.)Color Me Dazzled: Mastering City Lights and White Balance
Have you ever taken a night photo and realized your city suddenly looks like it’s been dipped in radioactive cheese? Yeah, that’s white balance.🍊 Avoid the Sickly Orange Glow
City lights—especially old sodium lamps—tend to pour yellow-orange all over your image. Go manual with your white balance and try something cooler (literally), like 3200K. Experiment until your high-rise doesn’t look like it’s on fire.🌈 Play With Color, But Don’t Punch It in the Face
Post-processing is where your photo grows up and gets a job. Boost the vibrancy, adjust contrast, and bring out the blues and purples that give city night shots their drama. But easy, tiger—too much color editing and your photo goes from moody to migraine.Timing Is Everything: When to Shoot
🌅 Blue Hour > Pitch Black
The best night photos aren't always taken at night. Plot twist! The blue hour—that brief, magical moment right after sunset or just before sunrise—is the real MVP. The sky still has color, the city lights are on, and your camera won’t cry in frustration.🕒 Midnight Adventures
If you want empty streets and that eerie, film-noir vibe, go super late. Between 12 AM and 4 AM, cities empty out like someone yelled “free kale” in the suburbs. It’s just you, your camera, and the occasional raccoon.Don’t Be THAT Tourist: Safety and Etiquette
Let’s not forget—cities are alive, unpredictable things. If you’re wandering around with a $2,000 rig strapped to your chest at 2 AM, remember:- Stay alert. That’s not paranoia, that’s paying attention.
- Avoid dark alleys unless you’re Batman.
- Be respectful. Don’t block sidewalks or flash people’s windows like a creeper.
- Watch where you step. That reflection might just be a puddle of city sadness.
Post-Processing: The Real Magic Trick
You thought you were done? Nah. Night photography doesn’t really come to life until you get home, fire up Lightroom, and whisper sweet adjustments to your RAW files.- Boost contrast and clarity to make lights pop.
- Play with shadows and highlights for that moody drama.
- Use noise reduction (gently!) to smooth out grainy textures.
Remember, post-processing isn’t cheating—it’s finishing what you started. Like dressing up your prom photo so it doesn’t look like a mugshot.
Common Night Photography Mistakes (And How to Not Be That Person)
- Shooting handheld: Stop. Get a tripod.- Overexposing lights: If your highlights look like exploding suns, shorten your exposure or lower ISO.
- Underexposing everything else: City lights are bright, but don’t forget the dark corners of your frame.
- Forgetting to shoot RAW: JPEGs are fine for selfies. RAW is your best bet for rescuing exposure and color later.
- Ignoring your surroundings: Keep one eye on your frame, and one on the shady character approaching from the side.
Final Thoughts: Let the Night Be Your Muse (But Bring Snacks)
Night photography in the city isn’t about perfection. It’s about embracing the chaos, the color, and yeah—sometimes the cold, concrete loneliness. But in all that, there’s beauty. There’s storytelling. And there’s a heck of a lot of potential for insanely cool photos you’ll be proud to post (with a humble-brag caption, of course).So get out there. Take weird, long-exposure photos of taxis. Capture the haunting glow of a 24-hour diner. Let the city tell its secrets. And who knows? Maybe you’ll fall a little in love with it after dark.
all images in this post were generated using AI tools
Category:
Photography TipsAuthor:
Shane Monroe
Discussion
rate this article
2 comments
Sarah Bowers
Unveil city secrets; let twilight's magic paint your lens.
February 9, 2026 at 3:33 PM
Shane Monroe
Thank you! Embracing twilight truly transforms urban landscapes into enchanting scenes. Happy shooting!
Juno Turner
Great tips! Capturing the magic of cities at night requires practice and the right gear. Remember to experiment with long exposures and adjust settings for low light to truly showcase the city's vibrant nightlife!
January 28, 2026 at 5:47 AM
Shane Monroe
Thank you! I completely agree—experimenting with long exposures and fine-tuning settings can really enhance night photography and bring out the nightlife's vibrancy!